Table
Tilting
The first thing we notice is that the table will tilt on the saw. We know that the table needs to be squared with the blade for our normal work. But there are many ways to do that. Some like to use a small machine square to square the table. Others use the old method of cutting into a block of wood then flipping it around to the back side of the blade to line the cut up with the blade. I have used a business card as a square to square the table with.
But none of these ways work as good as actually cutting on the table with the blade and material you are going to use. Maybe you apply a little pressure to the side of the wood as you cut. Maybe your blade clamps are not in line with the table. Just a lot of factors that can play a part in how the blade actually cuts. So the method I prefer is to actually make a cut with the blade. I do this by cutting into so scrap about 1 ½" then cutting out a 1" square. This doesn't have to be exact, just anything close to a freehand block. Now back out of the cut with the blade and try removing the square block from the wood. Slide it out the top and out the bottom. If it slides out both direction the same, then the table is squared to the blade cutting path. That doesn't mean it is especially squared to the table, but the final cut is square and that is the part we are concerned about. We know the blade will now cut square on the wood we are cutting. If your saw has table stops, adjust them now, so that after tilting the table, you can get it back too square easily.
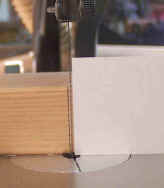
Notice that the blade does not line up with either the
flipped around wood or the business card. This
is one of the reasons that I do not like to use this method.
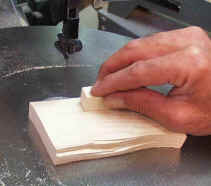
After cutting the block out, it should drop out the bottom
lift out the top. And notice that the bottom fits the hole just like the top,
the gap is only the width of the saw kerfs.
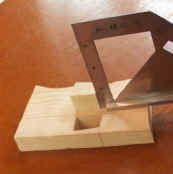
By checking it with a square it is square. But this table angle is the same as the first picture that shows the table is not really square to the blade. But right here is proof it is cutting square to the blade.
A simple way to assure your table is always square is to
try sliding the pieces out the top and bottom once in awhile as you are cutting
pieces away from your work. If they won't slide out both directions, go back and
square the table again.
But there are times that you will want to tilt the table. We all have seen the protractor scale on the saw. But how accurate is it. Not very, in most cases. I have seen patterns that call for a 4 ½ degree angle, try that one on the scale on the saw. The scale will get you close , but you will need to fine tune to get accurate bevels. There are some protractor and wedges on the market that may help in setting up the bevel you want, but actual cutting and taking measurements from the wood is the only way to do it accurately. We always need to keep in mind that the bevel on the wood is important, and what the protractor actually reads does not mean a thing.
Some saws tilt both direction and others only tilt one way.
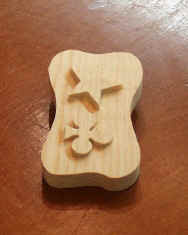
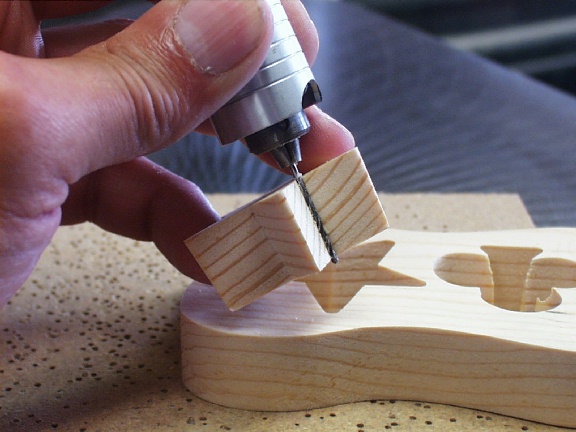
If you want the star to pull out away from the wood, tilt the table lower on the
right side. Then drill a hole, in alignment with the blade as the wood is on the
table, to get into the cutting line. Place the star to the left of the blade and
the frame back portion to the right side. Follow the line in a clockwise
direction. The star will now slide out the front and lock into position in the
wood. By placing the clover on the right side of the blade and cutting
counterclockwise the clover leaf will slide back and lock onto the ring. If your
table tilts lower to the left, you need to reverse directions of the cut to get
the same effect.
Normally tilting is somewhat of a trial and error
proposition. The wood has a tendency to try to slide down the to the lower side
of the table as you cut. So cutting accurate bevels is somewhat difficult. This
sliding doesn’t really affect the bevel unless you get excessive with it. The
main thing is that you are consistent throughout the cut. Cut some scrap and
measure the wood cut edge with an accurate protractor. Then reposition the table
until you get it set. That is the best way I know of to assure the angel is
exact. Then angle of the table determines how far the wood pushes through before
it locks into place. The more the angle the less it protrudes. The easy way to
remember the direction to go is think of the fact that if you cut it square, it
goes all the way through the wood. So that means as you increase the angle, it
has to decrease the distance it protrudes through the wood.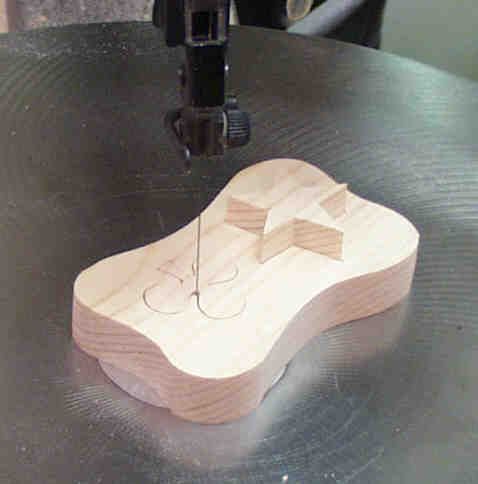
By changing the direction of the cut, you determine if the piece pushes forward or back to lock into place in the wood. This cutting method assures an exact fit into the wood as it is really the cutout that locks into the area it was cut from, verses trying to cut the hole then cut a shape to fit the hole.
But most of the tilted table cutting is not that
precise. We may angle the table to do a raised frame. That is where we want a
ring around the outside of the frame to pull forward and lock into position.
This is more of a by trial situation as the kerf of the blade also falls into
how much of a tilt the table really needs. By tilting the table you control how
far the ring slides out before it locks into place on the interior picture.
Moving the table back toward square the ring slides out farther, moving the
table to more angle keeps the ring from sliding out as far. You set the tilt, by
trial and error, to where the ring fits tight at the recess you want.
Some interesting things can be done on the saw with bevel
cutting. But most people will find that the biggest share of their cutting will
be with the table set square to the blade.
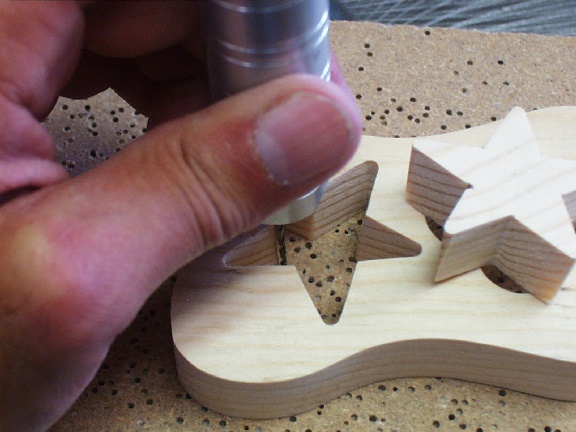
The blade size, or really the kerf width, also is important. The table angle was not changed to make these two cutouts. The clover was cut with a #5R blade, so the kerf was narrow. The star was cut with a #7R blade that has a wider kerf, allowing the piece to slide farther through the wood. So that means the angle and the kerf width both play an important factor in how far the piece slides through before locking in place.
Extra Tips
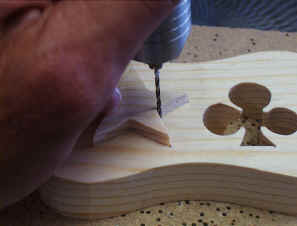
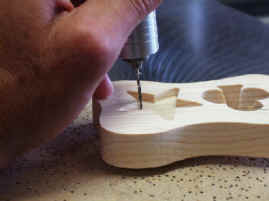
The easy way to get the right angle is to set up to drill the wood right on the scrollsaw table with a moto tool. Set the wood so it is oriented the way it will be cut, then aline the drill with the blade and the angle will be correct.
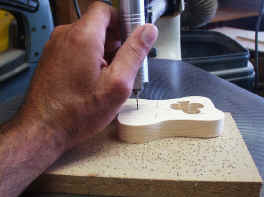
In this example the star is going to inset into the frame. So the hole should actually be in the star and not the frame. Once the star is inserted into place the hole could be filled, but is normally small enough to not be noticeable.
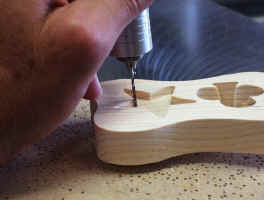
If the hole is drilled into the frame, when the star is inserted the hole will be seen along the inside edge of the recess.
If the star is to be extended from the frame the hole should be drilled on the frame side of the line. When the star is extended out, the edge of the star does not show the drilled hole, the hole is in the flat part of the frame that can be easily filled if needed.