Vacuum Chucking
I made my own vacuum chuck set up for the most part. I ordered the kit for the gauge and valve from Veneer Supply. http://www.veneersupplies.com/product_info.php?products_id=2300
For the shaft to go through the headstock I made that myself with lamp rod. First try I used 1 bearing with a brass fitting JB Welded into place. That seemed to work but pulled 22 inches of vacuum. Then I made another one with 2 bearings and it pulled 26 inches of vacuum, so I am using the 2 bearing model. I just used Corian to make the bearing holder block from. Then taped the end so I could screw the lamp rod into place.
The corian is an adapter made so that the lamp rod screws into the one end. That end of the adapter has a small tenon in it to fit into the handwheel to just keep it centered.
On the other end of the corian there is a rabbit for the 2 stacked bearings to go into, and I uses JB weld to seal them in place. Then the air hose coupling is JB welded into the bearings.
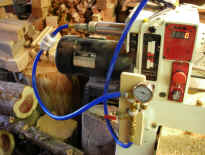
Around the end of the lamp rod coming out the headstock is a rubber seal, actually the rubber gasket from a toilet supply line. Then that gets the washer and nut to hold the rod tight into the shaft of the headstock.
The vacuum goes from the air chuck, thru the bearing centers, a little corian, then into the lamp rod that comes out past the headstock. The rubber seal is to keep from losing vacuum from the end of the lamp rod back around the end of the lamp rod and back out the headstock hole that the lamp rod shaft is in.
So the vacuum is in the airline coming in and the to the vacuum chuck screwed onto the headstock, where you are creating the vacuum.
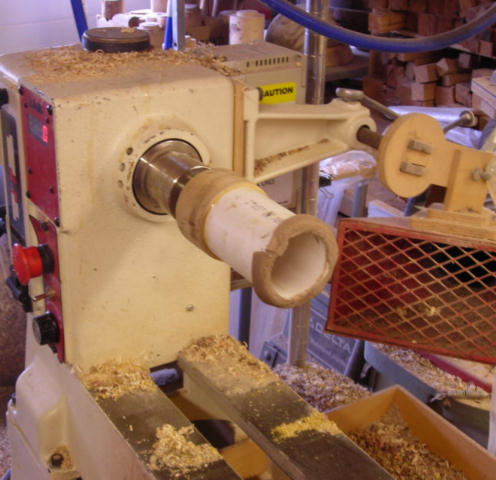
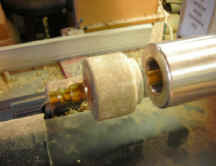
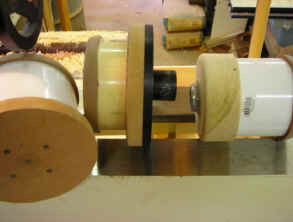
More details of how it fits to the lathe. The brass threaded rod is lamp rod cut to length. The coned rubber at the headstock is seal that you normally find on the water hookup on a toilet water supply. I put it on the lamp rod then the washer and nut. Then used a skew to cut it down to fit the shaft size.
Then I made my own chuck bodies too.
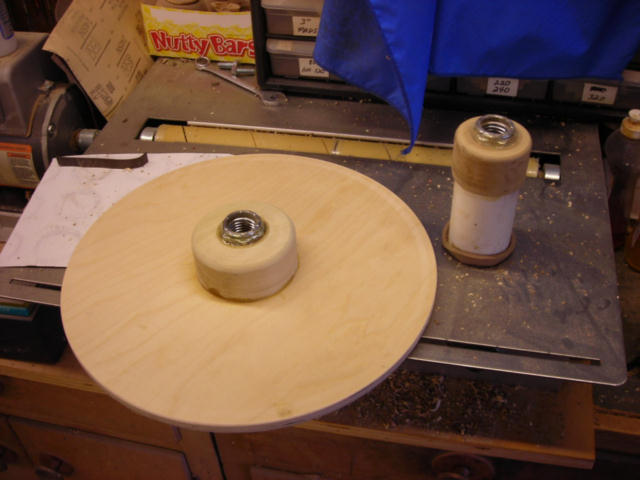
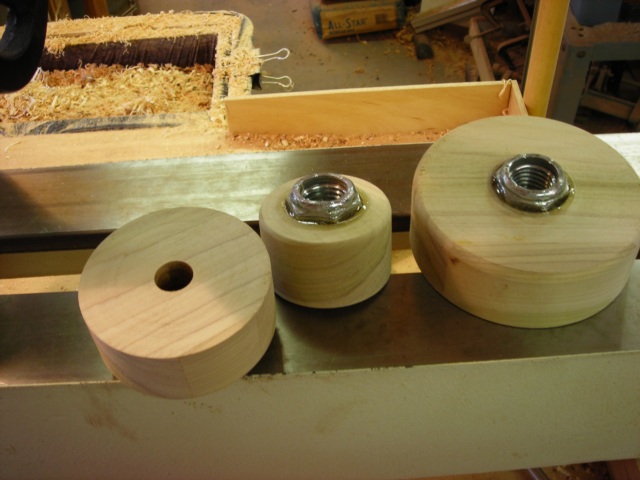
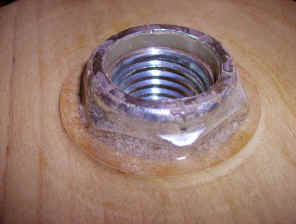
After taking the Bonnie Klein class I learned that you could use the nylon
ring nuts for chucks. By turning the nylon out of the ring they will then
bottom out on the spindle like a chuck is suppose to do. I also used a regular
scraper to cut just a little of the base to make sure of a good flat surface to
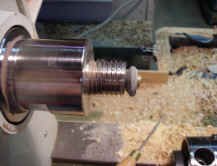
seat on. The nut was put into a hole in the wood. Then epoxy poured around it.
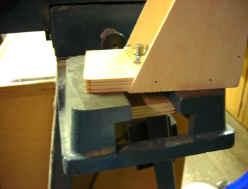
Then I chucked the wood block by the new nut and turned the face side and back
true to the nut. What you are seeing in picture 2 is where I stopped the cut on
the back at the epoxy.
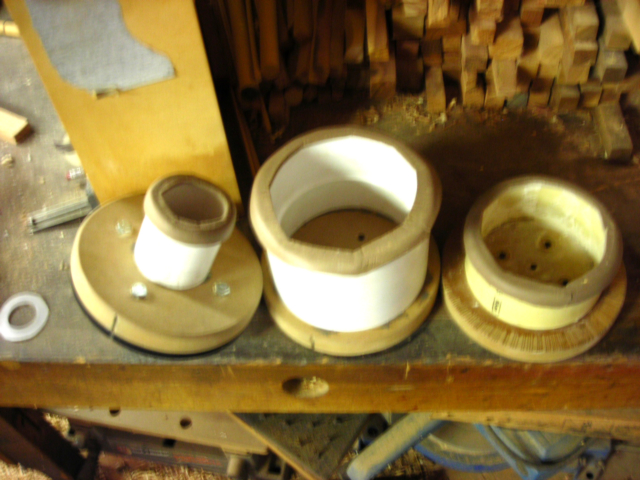
These were easy to make and I made a complete set of vacuum chucks so I would not have to change the different sizes on the face plates any more. I used poplar to make these then discovered that I could not pull a good vacuum anymore with my system. Well it turns out that poplar must be porous because after coating the inside of the chuck wood surfaces with Titebond II glue the gauge was right back up to 26 inches.
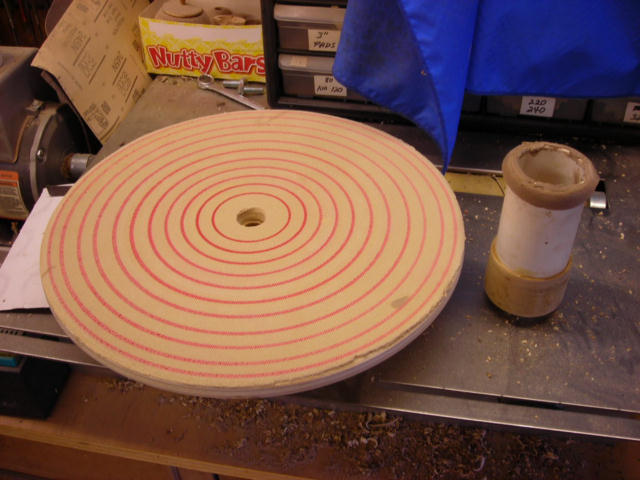
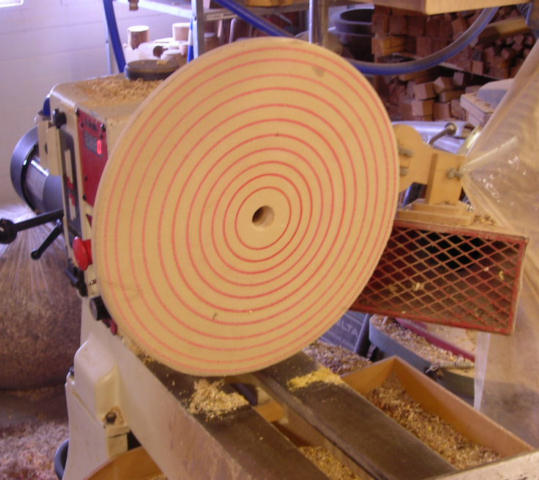
Made another new chuck for the vacuum system today. Made with one of the acorn nuts and wood blocks. Then used 1/2" BB plywood for the big disc plate. Glued the plywood onto the chuck block then turned the edge smooth, then used the parting tool to make the center hole into the wood disc for the vacuum tube. Had the mat, I think it may have been some sort of router mat, not sure where I originally came up with it. I used 3M Super && spray to attach mat to the wood. I used a exacto knife to cut the mat after attaching it to the wood disc. Put the setup on the lathe then used a red magic marker held on the tool rest and turned the disc by hand to make the rings. These give me something to line the bowls up on tto start with. I used the system to do this batch of bowls and it seems to work good. It does not pull as much vacuum as my other PVC tubes, the foam may be an open cell foam, not closed cell. But it still pulls between 10-16 on the guage and using the tailstock up until the final nib it works just fine.